Category: Advanced training

SkyDemon and IFR flight

IRR students often ask “Can I use SkyDemon to navigate on an IMC training flight or test?”

The official and legally correct answer is “No”. SkyDemon is a VFR tool. Only certified,

installed GNSS navigators, such as an IFD550, GTN650 or GNS430 can be used to fly IFR and instrument approaches. Furthermore, the license conditions of SkyDemon expressly forbid its use as a primary means of IFR navigation.

In real-life flying, though, it is prudent to use anything which makes the task easier, provided it is not inherently unsafe or misleading. Many IFR pilots run SkyDemon in the cockpit as an adjunct to their formal navigation aids.

In what ways can you use SkyDemon to support your IFR planning and flying?

  1. For route planning, use it to generate the data for an IFR PLOG (including VOR radials and DME distances from turning points)
  2. For situational awareness, whilst navigating cross country
  3. To display traffic detected from an external source such as SkyEcho
  4. To store and call up instrument approach plates in flight
  5. For situational awareness whilst flying an approach

There are a few set-up steps to be undertaken on your planning computer and in-flight device:

  • Mapping: in Airfield, enable show Radio Navaids and Airways Reporting Points (these are the 2-syllable, 5-letter names in the database of GNSS navigators)
  • Setup – Planning: enable ‘Show IFR features’ (otherwise Instrument plates will not appear when you look at aerodrome information)
  • Setup – Planning: set the MSA calculation to IFR (1000 feet above, 5nm either side of track)
  • Setup – Navigation – Moving Map – set the display to Heading up. In-flight, pressing on the Little North arrow (bottom right) allow you to Select Track up – which is the default SOP for GNSS navigators.

For route planning, we can do all the normal stuff to generate a PLOG, check NOTAMs etc. Flying IFR, we may route via Airways reporting points and the SkyDemon PLOG delivers everything you need to know. If we are using VOR radials and distances to achieve a desired route and avoid Controlled Airspace, we might construct these with SkyDemon to get really accurate Track, Heading and Distance. It’s a bit of a faff; I find it easier to draw the lines on a paper chart and measure the radials and DME distance. It’s your choice.

We can use Instrument Approach plates from SkyDemon in 2 ways:

  • Simply use your inflight device to display the plates – they should have downloaded automatically to your device before flight if you have selected the airfield as ‘Land here’.
  • As you get closer, the ‘Make Approach’ button will appear bottom left. you can select either Visual or Instrument approach for the desired runway. If you select Instrument approach, the relevant plate will be superimposed (georeferenced) onto your SkyDemon map. Unfortunately, the moving map goes back into North Up mode, as the georeferencing can’t cope with anything else.
  • You could also GeoReference the approach plate onto the SkyDemon display from the Airfields Tab, where the Instrument approach plates are listed, by using the ‘Pin’ button.

The georeferenced display are helpful for situational awareness, but not to fly the approach accurately – you need the radio navaids for that! not accurate enough to fly the approach– they are not a substitute for ILS receiver or certified GNSS navigator onboard!

Give it a try – ideally with a safety pilot onboard. In any event, don’t allow operating SkyDemon to distract you from the task of flying the aeroplane.

Know your approach plates        

When flying an instrument approach in a test, you’ll know ahead of time which approach is to be flown and can prepare on the ground. In real life, you may not be able to prepare in advance, so know your way around the plate so that you can extract essential information quickly.

Some pilots use unwieldy and generally unmemorable acronyms to brief the approach. I find that a flow, or visual scan, around the plate is a better way to self-brief. You can use a pen on the plate to highlight key information. The only elements requiring any maths are the approx. descent rate which varies with ground speed, and the all-important minima.

Presentations vary, but here is a ‘flow’ that works for the UK AIP plates.

Geo-referenced instrument approach plates

Aircraft with sophisticated GNSS (aka GPS) navigators may have approach plates installed in the database. SkyDemon offers a simple way of accessing geo-referenced plates. It uses the AIP plates (whose format varies from one country to another). Geo-referenced? This means that they are displayed to scale, in the right location on the map display.

They are a great aid for situational awareness and for coarse positioning on an instrument approach. They should not be used as a substitute for receiving the relevant radio navigation aid (VOR, NDB, ILS, GNSS) using NAV equipment such as a CDI (Course Deviation Indicator).

Here’s how to go about it:

  1. In Setup, Planning options, enable IFR features
  2. Right click on Airfield, right click on Information
  3. Click on Instrument Plates. Select the plate(s) you want. Green means they are available on your device. On some devices, you may have to click on individual plates to make them available offline
  4. In flight, click on the Airfields tab. Click on the Pin symbol to display the plate you want. It appears to scale on the chart.

That club check-out – tedious chore or interesting opportunity?

Many clubs have a currency rule of some kind for PPL’s – e.g. a member must fly at least once in 28 days to stay current. After that they need a check-out within an instructor. If just out of check, that may just be a few circuits. If several months, it may include some general handling.

The check-out is often regarded as a tedious formality, but I always aim to make it useful. While checking the pilot’s general flying ability has not deteriorated, it’s also possible to inject something valuable that’s new or forgotten.

For example, within a circuit checkout, after appropriate briefing:

  • A briefing on transponder checks (a hot topic in relation to infringements)
  • A simulated engine fire on start-up
  • A soft field take off (topical at our muddy grass runway in winter)
  • A glide approach from an unusual position
  • Simulated stuck throttle on approach
  • A scenario of partial power after take-off, often (surprise, surprise) culminating in a simulated total engine failure to a glide approach
  • A bad weather circuit
  • Cross wind landing techniques

In a general handling check, a PFL, some stalls and steep turns are generally the norm. We could also include:

  • A bit of VOR tracking out to the local area
  • A practice PAN call to D&D 121.5 to simulate a emergency or being lost
  • A brush up of SkyDemon use.
  • A collision avoidance break (steep turn)
  • Demo (from a safe height) of the height loss after engine failure in a 180 degree turn-back (the height loss is more than most people expect)
  • Flight on instruments when returning from the local area

There are lots of possibilities.

What can I do next?

So you passed your PPL skills test and have a PPL licence. You’ve spent some time flying cross country trips in the UK, and maybe overseas. Perhaps you are seeking a new challenge and wondering what other qualifications you can add?

Some are more demanding than others, but here a list.

Pre-requisites Theoretical knowledge Minimum training Licence issue
Night rating None Ground school briefing 5 hours, incl. 1 hour dual cross-country & 5 solo take offs and landings Application form and fee to CAA
IR(R) or IMC rating 10 hrs PiC (incl 5 hrs cross-country) post licence issue Single theory exam (paper) 15 hours of which 10 hours FBSRI 25 hours post-licence issue (which can include the IR(R) training itself
Flight instructor (FI) for LAPL only PPL(A) + 10 hrs instrument training +

20 hr PiC cross-country + QXC 300 nm with 2 intermediate landings


30 hr SEP (of which 5 hr in 6 month prior to pre-entry test)

25 hr of teaching and learning;


100 hr TK


Pre-entry test +


30 hr flight instruction, of which 25 hr dual ; rest could be mutual flying with another FI student

Test (AoC)

200 hr total flight time of which 150 hr PiC

Flight instructor (FI) LAPL & PPL As above + CPL(A) or PPL(A) As above + for a PPL holder – CPL TK As above As above
Modular CPL 150 hours total flight time

Night rating (or can be done on CPL course)

ATPL / CPL theory completed prior to flight training Pre-entry test +

25 hours instruction, of which 10 hr instrument flying (unless an IR is already held)

At least 5 hours in 4-seat complex aircraft

Skills test

200 hrs total time (incl CPL training) of which

100 hr PiC

20 hr PiC cross country

Have chat with your CFI to figure out what would be the best option for you. And with that in mind, start building the required hours and cross-country experience.

Rate 1 turns on EFIS

They say you never stop learning in aviation. This little snippet illustrates that.

Last week I was out renewing my instructor rating, and amongst other things, I had to demonstrate a rate 1 turn on instruments. Easy, right? Look at the Turn Coordinator and line up the wings of the little aeroplane on the tick marks.

But how do you do that in an aeroplane equipped with an EFIS (electronic flight information system, or glass cockpit). They often don’t have a conventional Turn Coordinator. Well, you could calculate the bank angle (TAS divided by 10 plus 7 degrees) and use the Skypointer on the attitude indicator.

But thanks to pilotworkshop.com who send a free weekly email with tips, I learnt an easier way. Beneath the heading indicator is a magenta trend ribbon, showing which way you’re turning. This has marks – in my Dynon D100, that’s a bracket which corresponds to Rate 1. So just add sufficient bank that the magenta line reaches the bracket. And the trend line itself is quantitative – the longer the line, the greater your rate of turn. The end of the line shows the heading you will be on in 6 seconds. And that 6 seconds seems to be a standard on all displays.

So…. If in doubt, read the instruction manual. I read mine years back, but at that time, instrument flying was far from my thoughts.

CPL hour building

I’ve written about this before, so take a look at https://aiminghigher.aero/tips/hour-building/

Here are some more thoughts.  I still believe there is little value in just flying your mates and granny around the local training area! Use hour-building to gain experience – go to different places, fly more challenging missions, complete the CPL QXC, do more accurate flying, practice doing performance and weight & balance calculations, professional PLOG keeping and so on. That way, you’ll be better prepared for the more demanding standards of CPL flying.

What do the rules say about hours?

There are minimum requirements to start a CPL course, and different (higher) minimum requirements to apply for a CPL. This means that some hour building could be completed during parallel with the CPL flight training – if you have the time and money.

Total hours PiC hours PiC cross country Night hours Total CPL training Instrument instruction
For entry to a CPL course 150 50 10
To apply for the CPL 200 100 20, incl CPL QXC 5
incl 5 solo t/offs & landings
25 10
(max. 5 on an approved simulator


You also need to complete the CPL (or ATPL) theory course.

The CPL QXC is the same concept as the PPL QXC, but longer: it’s a VFR cross-country flight of at least 540 km (300 NM), with full stop landings at 2 aerodromes different from the aerodrome of departure.

Other things to consider

  • Do your flying from somewhere that can offer advice and inspiration when you need it.
  • Consider a share in a cheap, but reliable aeroplane for hours building, or see if you can negotiate a discount for hour-building on a club aircraft during the week when it’s not used much. Is a share cheaper than hire? – you’ll need to do the maths, and also get some advice of the pro’s and con’s of owning a shared aeroplane.
  • The first priority of hour building is to gain PiC experience. However, the difference between the required total hours and PiC hours means that you could ‘afford’ to get some additional PUT training time, for fun or to build skills useful for later in your training. For example, you might use some flying time to get a tail-wheel rating or get some experience in instrument flying and instrument approaches. The example below shows how it could work.
Total hours PiC hours
PPL training 65 15
Post PPL flying 15 (incl. check outs) 10
Night rating 6 1
Hour building needed 84 74
Expected CPL training 30
Total 200 100
  • Get familiar with more advanced predictive weather tools (Windy, GRAMET and so on) and build up your own preferred set of flight planning app’s. Really understand all the things that SkyDemon can do for you.
  • Start building your knowledge of the ‘rules’. The EASA Easy Access Rules and the UK ANO are not edifying reading, but you should start finding out for yourself what some of the rules say.
  • Attend as many seminars and webinars as you can to expand your knowledge. The CAA, Flyer magazine, GASCo, the RAeS are just some of the organisation that offer these from time to time.
  • If a particular aspect of theory piques your interest, then you could start diving into more detail as preparation for the CPL theory course.

Brexit

We still don’t know what will happen as far as aviation is concerned, though it is extremely likely that the UK will NOT be part of the EASA club and the nature of any future agreements is uncertain. Whilst ICAO convention means that UK PPL’s should be recognized in EASA-land,  we don’t know how / if UK licenses will be recognized by non-UK commercial operators. You will need to decide whether you want a UK CPL or an EASA CPL and that will affect your choice of ATO’s for the training. Hopefully, this regulatory fog will have cleared by the time comes to start your CPL training!

Meanwhile, get out and enjoy some flying!!

IMC rating on EASA licences – extended

Second Update

The EU has now implemented the Commission Implementing Regulation (amendment) 2019/430 revising Article 4(8) to the EASA Aircrew Regulations, which was referred to by me a couple of months ago. This measn that the CAA will continue to endorse the Instrument Rating (Restricted) (IR(R)) rating on UK CAA issued EASA PPL(A), CPL(A), MPL(A) and ATPL(A) licences until 8 April 2021. The IR(R) may not be endorsed on Part-FCL licences issued by other EASA Member States.

Details of the Flight Test for the rating is included in Standards Document 25.

Those who want to read the revised Aircrew regualtion (not many, I suspect) can see the update here and the consolidated regulation here.


Preparing for IMCR (or IR(R)) training

Test-ready in the minimum 15 hours flying?

PPL’s often start IMCR training in the belief that they will be ready in 15 hours (10 hours by sole reference to instruments).  In my experience, it takes longer, and this often comes as a personal disappointment and financial shock.

PPL’s come to the course with varying backgrounds – recent PPL’s with only 10 hours post-license issue (the minimum), those with 100’s of hours, converts from microlight flying, and pilots used to operating in easy class G airspace.

Shortcomings in PPL’s experience

Here is a list of what I’ve seen, which I can help students overcome:

  1. Lack of practice / fluency in challenging RT environments (busy CAS, complicated instructions) and accurate read-back
  2. Not thinking ahead – anticipation of what’s coming next
  3. Not knowing how the avionics work (the more so in club aircraft with different bits of kit)
  4. Not flying accurately (trimmed out, constant altitude, heading, rpm setting, constant climb / descent rates and speeds)
  5. Weak ability to interpret pre-flight data (weather, NOTAMs etc)
  6. Inadequate pre-flight preparation (departure and arrival from / to base, clear PLOG, knowing what RT to expect)
  7. Unfamiliarity with basic instrument work e.g. VOR intercept and tracking, and position plotting
  8. Not arriving for lessons well-rested, well-prepared, in good time, focussed etc
  9. Lack of captaincy – which is all about decision making, mental situations awareness, but also the  ability to self-brief, de-brief and critique.
  10. Failing to scan the instruments systematically
  11. Not appreciating the differences between control and performance instruments

The good news

I make these observations not to criticize individuals but to make the point that all of these things can be practiced in the VMC environment (although the last 2 are best done with a safety pilot onboard or while receiving an ATC Traffic Service), by reading and viewing YouTube videos.

So to get the most our of your hard earned cash – practice the basics before starting the course. That way the IMC instructor only needs to spend time on teaching instrument flying, rather than all the supporting skills. Hope this helps.

Flight Examiner

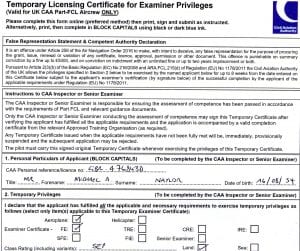
I am pleased to announce that I have passed the Assessment of Competence for the PPL Flight Examiner certificate. This means that I can now conduct LAPL(A) and PPL(A) skill tests, IMCR / IR(R) skill tests and LST / LPC tests for SEP rating issue / re-validation.